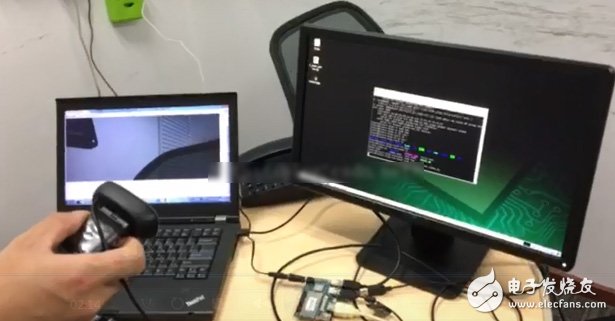
After reading the previous blogs, I believe that you have basically used Python scripts to develop various USB camera image acquisitions on the Dragoboard 410c. Here, in order to further enable everyone to play the role of the UBS camera, and to facilitate everyone in the development process. The information collected by the Dragoboard 410c is published online. This article combines the previous article to introduce the blog of the BOA web server, and takes everyone together to complete how to collect images in real time on the Dragboard 410c with Python scripts and OpenCV libraries, and publish them to the web. On the web, users can access the images captured by the camera. First of all, you need to prepare all the devices mentioned in the blog article - based on the Dragoboard 410c USB camera face recognition, you need to prepare a wireless router to provide network support for the Dragoboard 410c development board, and also need to prepare a mobile phone or computer. Used to test access to the Dragoboard 410c development board. Then we can start to build our Dragoboard 410c web server environment, here you can go directly to http:// official website to download the source code, after downloading the source code, you can copy to the Dragonboard 410c development board, use tar on the development board - The xvf file name is decompressed. After decompressing, the cd command enters the src directory. Execute the ./config in the src directory to compile and configure the makefile. Here we need to modify the short answer. The specific changes are as follows: Modify the header file defines.h Found #define SERVER_ROOT "/etc/boa" modified to #define SERVER_ROOT "/var/www" This defines the file root directory of the web server (users can define it themselves, it is a directory on the board, as long as it is consistent with the settings in boa.conf) Then run make to compile, get the executable program boa, strip the debug information, the final program is only 62872Byte size. Then, according to the configuration method I used to transplant the Boa server using the cross-compilation method, I can configure the web server. (web server porting based on Dragoboard 410c) After configuration, we can find the /var/www directory, this time we just use sudo boa to start the boa server, then put the prepared html file and script file into the directory, you can access it through the browser. If you can successfully access the html file, the boa server is built successfully. After completing the Boa server setup, we can then refer to the article: the method of saving images in the USB camera based on Dragoboard 410c, get and save the image, write a script to get the image and save it to the WWW directory, then we write another The html file to display and refresh the image can access the image captured by the camera through the web network. First, write the script to get and save the image information. Here we remove the display part of the USB camera based on the Dragoboard 410c to save the image. Just take the image every time and save it to the WWW folder. Python code as follows: After completing the acquisition and saving of the USB camera image code, we can perform a simple test. Run python get_pic.py to see that the .jpg image file exists under the www folder. Then we can write html files, html is mainly used for front-end interaction, display images, here we also refresh the display image regularly, and then we can achieve dynamic image acquisition and display, the specific html code is as follows: #!/usr/bin/env python After completing the html writing, save the html file to the www directory, then we connect the board to wifi, and then access the USB camera image through the mobile phone or computer connected to the wifi, specifically enter 192.168.23.6/test in the browser. Html can be, the specific effects are as follows: Test Here is just a simple picture web release. In fact, in the process of creating your own, if you want to publish the collected data to the network, the principle is similar, and if you want to achieve more through the web The dragonboard 410c controls it and can be implemented with reference to cgi programming. USB Modem is a device which allows like a desktop computer or laptop to access the Internet with very high speed up to 100Mbps or more. Today there are different types of LTE modems on the market that are suitable for various applications such as stationary use as a DSL replacement or mobile browsing, or industrial use M2M connectivity. The Peak speed of USB Modem with LTE module could reach peak download speed up to 100Mbps and download speed at 50Mbps, so many customers call such LTE USB modem as 100Mbps modem. Based on the technology of the data transmission, USB modem could be divided into TDD Modem and FDD Modem. Cat3 USB Modem,Wifi Modem,4G LTE Dongle,4G LTE USB Modem Shenhzhen Tongheng Weichuang Technology Co., Ltd , https://www.thwclte.com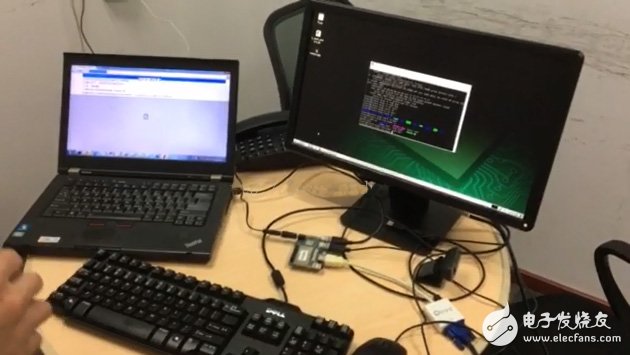
Import cv2, sys
Import TIme
DEVICE_NUMBER = 0
IMAGE_FILE = ""
# Init webcam
Vc = cv2.VideoCapture(DEVICE_NUMBER)
# Check if the webcam init was successful
If vc.isOpened(): # try to get the first frame
Retval, frame = vc.read()
Else:
Sys.exit(1)
# If webcam read successful, loop indefinitely
While retval:
# Write some text onto the frame
# Show the image on the screen
# cv2.imshow("DB410c Workshop #3: Show Video", frame)
Cv2.imwrite(IMAGE_FILE, frame)
TIme.sleep(1)
# Grab next frame from webcam
Retval, frame = vc.read()
# Exit program after waiTIng for a pressed key
If cv2.waitKey(1) == 27:
Break